The Honeywell Pro 4000 Thermostat is a programmable digital thermostat designed for ease of use and energy efficiency. It offers flexible scheduling and straightforward installation.
Overview of the Honeywell Pro 4000 Thermostat
The Honeywell Pro 4000 Thermostat is a programmable digital device designed to enhance heating and cooling system efficiency. It features a user-friendly interface with a backlit display, making it easy to navigate and set temperature schedules. This thermostat is compatible with a wide range of HVAC systems, including gas, oil, and electric configurations. Its programmable functionality allows users to customize temperature settings for different times of the day, optimizing energy usage and comfort. The Pro 4000 also supports adaptive recovery, which learns the system’s behavior to reach desired temperatures efficiently. With its compact design and intuitive controls, it is a practical solution for both residential and light commercial applications. The thermostat is backed by Honeywell’s reputation for reliability and durability, ensuring long-term performance and energy savings.
Importance of Proper Installation
Proper installation of the Honeywell Pro 4000 Thermostat is crucial to ensure optimal performance, energy efficiency, and safety. Incorrect installation can lead to malfunctions, inaccurate temperature control, or even safety hazards. Following the installation manual carefully guarantees that the thermostat operates as intended, providing consistent heating and cooling. Improper wiring or setup can result in system incompatibility or premature wear on HVAC components. Additionally, correct installation ensures that all advanced features, such as programmable scheduling and adaptive recovery, function correctly. It also prevents potential issues like short circuits or faulty sensor readings. By adhering to the guidelines, users can enjoy reliable operation, reduced energy bills, and extended system lifespan. Proper installation is the foundation for maximizing the thermostat’s benefits and maintaining a comfortable indoor environment. Always refer to the official manual for precise instructions tailored to the Honeywell Pro 4000 model.
System Requirements and Compatibility
The Honeywell Pro 4000 thermostat is compatible with standard HVAC systems, including 24V heating and cooling setups, requiring proper wiring and voltage checks for optimal functionality.
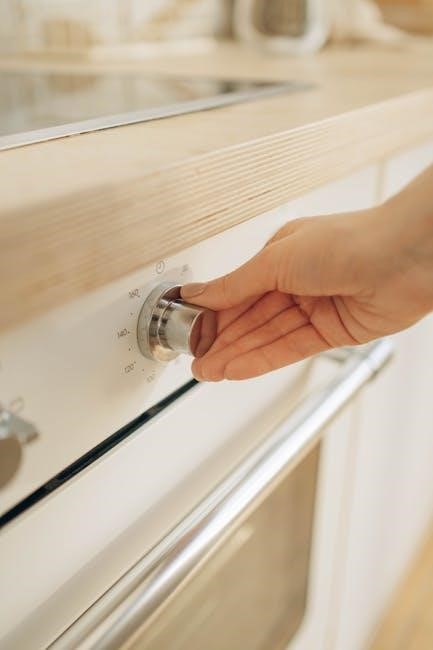
Before installing the Honeywell Pro 4000 thermostat, ensure compatibility with your HVAC system. Verify that your system operates on 24V AC power, as the thermostat is designed for low-voltage systems. Check if your system includes heating, cooling, or both, and confirm the number of stages (e.g., single-stage, two-stage, or multi-stage). The Pro 4000 supports up to two stages of heating and two stages of cooling, making it suitable for most standard systems. Additionally, ensure your HVAC system does not require a high voltage or millivoltage setup, as the Pro 4000 is not compatible with such configurations. Proper compatibility ensures reliable operation and avoids potential installation issues. Always refer to your HVAC system’s manual for specifications. To install the Honeywell Pro 4000 thermostat, gather the necessary tools and materials to ensure a smooth process. You will need a screwdriver (both Phillips and flathead), wire strippers, and pliers for handling wires. A voltage tester is essential to confirm power is off before starting work. Additionally, a drill and wall anchors may be required if the wallplate needs to be mounted in a location without existing screws. Ensure you have the thermostat unit, wallplate, and all included hardware from the packaging. For systems with complex wiring, label makers can help organize wires. Always refer to the installation manual for specific requirements. Having these tools and materials ready will simplify the installation process and minimize potential delays. Safety should always be a priority when working with electrical systems. Understanding the wiring requirements for the Honeywell Pro 4000 thermostat is crucial for a successful installation. The thermostat typically requires a 24-volt power supply from the HVAC system, ensuring safe and efficient operation. Common wire connections include the R (24V power), W (heating), Y (cooling), G (fan), and C (common) wires. If your system uses additional features like heat pumps or zone controls, extra wires may be needed. Always verify the wiring configuration with your HVAC system’s specifications to avoid mismatches. Improper wiring can lead to system malfunctions or safety hazards. Refer to the installation manual for detailed wiring diagrams and instructions tailored to your system type. Properly labeling each wire during removal of the old thermostat can simplify the reconnection process. If unsure, consulting a licensed electrician is recommended to ensure compliance with safety standards and optimal performance. Before installing the Honeywell Pro 4000 thermostat, ensure all necessary tools and materials are ready. Verify system compatibility and review the manual for specific instructions. Before starting the installation, ensure the HVAC system is completely powered off to avoid electrical hazards or damage. Locate the circuit breaker or switch controlling the system and turn it off. Verify the thermostat is set to “OFF” and check that all components, including the furnace and cooling units, are inactive. If unsure, consult the system’s manual or contact a licensed electrician. This step is crucial for safety and prevents any accidental startups during installation. Always double-check that power is off using a voltage tester if available. Proceed only when confirmed the system is safely deactivated. To remove the old thermostat, start by ensuring the HVAC system is powered off at the circuit breaker. Gently pull the thermostat away from the wall to access the wiring. Disconnect the wires from the old thermostat, taking care not to damage them. If the wires are stuck, wiggle them gently to free them. Once the wires are loose, remove the old thermostat from the wallplate. If the thermostat is screwed into the wall, remove the screws carefully. Set the old thermostat aside, ensuring the wires remain intact and organized. Label the wires with masking tape if necessary to identify their connections for the new installation. This step ensures a clean and safe transition to the new Honeywell Pro 4000 thermostat. To mount the wallplate for the Honeywell Pro 4000 Thermostat, begin by ensuring the area is clean and free of debris. Use a level to align the wallplate straight on the wall. If the old thermostat’s wallplate is damaged or improperly sized, remove it and install the new one provided with the Honeywell Pro 4000. Screw the wallplate into the wall using the provided screws, ensuring it is securely fastened. If necessary, use drywall anchors for added stability. Align the wallplate with the wires, making sure they are neatly organized and not pinched. Once the wallplate is mounted, double-check its alignment and security. Avoid over-tightening the screws to prevent damage to the wall or the wallplate. Proper mounting ensures a smooth installation and optimal performance of the thermostat. The Honeywell Pro 4000 Thermostat installation involves connecting wires, setting up the thermostat, and performing final connections and testing to ensure proper functionality and efficiency. Connecting wires to the Honeywell Pro 4000 Thermostat requires careful attention to ensure proper functionality. Begin by turning off the power to the HVAC system and verifying the wiring compatibility with your existing setup. Refer to the installation manual for specific wiring diagrams, as the color-coded wires (e.g., R, W, Y, G, C) correspond to distinct functions. Label the wires before disconnecting them from the old thermostat to avoid confusion. Connect each wire to the corresponding terminal on the new thermostat, ensuring secure and tight connections. Avoid forced connections, as this could damage the terminals or wires. Double-check all connections to prevent errors. If unsure, consult the manual or contact a professional for assistance. Proper wiring ensures smooth thermostat operation and prevents potential system issues. After installing the Honeywell Pro 4000 Thermostat, proceed to set it up for optimal performance. Start by powering on the thermostat and following the on-screen prompts to select your preferred language and unit of measurement. Set the current date and time to ensure accurate scheduling. Choose the correct HVAC system type (e.g., gas, electric, or heat pump) to match your home’s setup. Configure the temperature range and differential settings to balance comfort and energy efficiency. Program your daily schedule by setting specific temperatures for Wake, Leave, Return, and Sleep periods. Use the Adaptive Intelligent Recovery feature (Function 13) to allow the thermostat to learn your system’s behavior and pre-heat or cool to meet your schedule. Save your settings and test the system to ensure proper operation. Refer to the manual for advanced features and troubleshooting. Proper setup ensures efficient energy use and consistent comfort. After connecting all wires to the Honeywell Pro 4000 Thermostat, restore power to your HVAC system. Ensure the thermostat display turns on and functions properly. Test each mode (heat, cool, and fan) to confirm the system responds correctly. Check that the thermostat cycles on and off as expected and maintains the desired temperature. Verify that all programmed schedules and settings work seamlessly. If any issues arise, refer to the troubleshooting section in the manual. Once confirmed, secure any loose wires and replace the thermostat cover. Perform a final system test to ensure smooth operation. Properly completing these steps guarantees reliable performance and energy efficiency from your Honeywell Pro 4000 Thermostat.Checking Existing HVAC System Compatibility
Tools and Materials Needed for Installation
Understanding Wiring Requirements

Preparing for Installation
Turning Off Power to the HVAC System
Removing the Old Thermostat
Mounting the Wallplate
Installation Steps
Connecting Wires to the Thermostat
Setting Up the Thermostat
Final Connections and Testing